
StakeholderIQ Download and Setup Instructions
How to setup GitHub and Claude Code to run StakeholderIQ

Preface
The example below uses my StakholderIQ product. Adjust the naming conventions, etc as needed for other products.
Encouragement
I want to say up front that you do not need to know how to do command line instructions from a computer terminal interface (like software developers do).
What I teach you below, is how to manage GitHub WITHOUT using command lines.
I also teach you how to use Claude Code without having to use a terminal/CLI/ IDE interface.
Please read thru these instructions in total first.
It may seem like a lot. But this is really ONE time setup. Once setup, you are ready to work!
I am teaching you how to use these "developer" tools to do cool things with GenAI without you having to learn the "language" of software development.
And you never have to touch a command line...
If you feel you can accomplish these steps then you can use the any of my project brains!
Things you will need:
Accounts you need:
- GitHub account
- Claude Pro Account (to use Claude Code)
Software to download:
- Claude Desktop (on your PC)
- Claude Mobile App (on your phone)
- GitHub Desktop (on your PC)
- GitHub Mobile App (on your phone)
Basic Steps
- Create a GitHub account
- Create your first GitHub Repo
- Download GitHub Software
- Clone your Repo
- Uploading Product Files to the Repo
- Register for Free Claude Account
- Upgrade to Claude Pro
- Connecting Claude Code to GitHub
- Seeing Your Repo From Claude Code
Creating a GitHub Account
Visit github.com
Click Sign up in the top-right corner

Enter Your Details
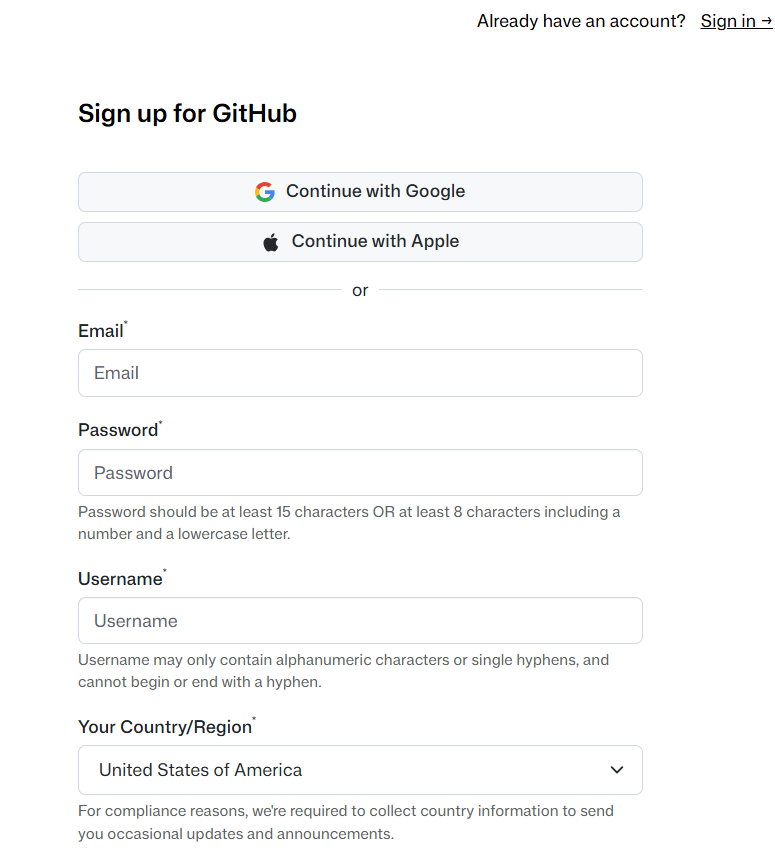
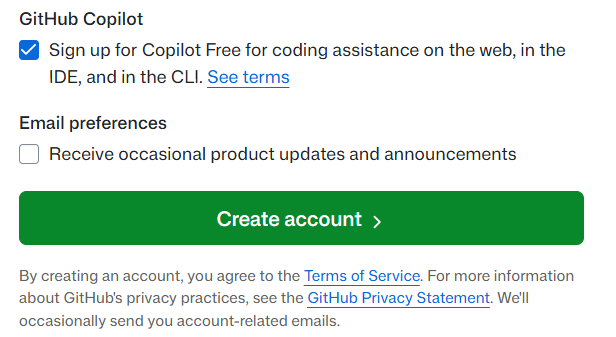
This includes:
- Type your email address
- Create a password (at least 15 characters, or 8+ with a mix of letters, numbers, and symbols)
- Choose a username (unique, visible to others, I recommended using either a generic username or a form of your business name if you have one)
- Your Country/Region
- Choose whether to receive product updates (optional)
Click Create account
Alternatives: you can create an account using your Google Account or your Apple Account
Check your inbox for a verification email from GitHub
Enter the 8-digit code sent to your email
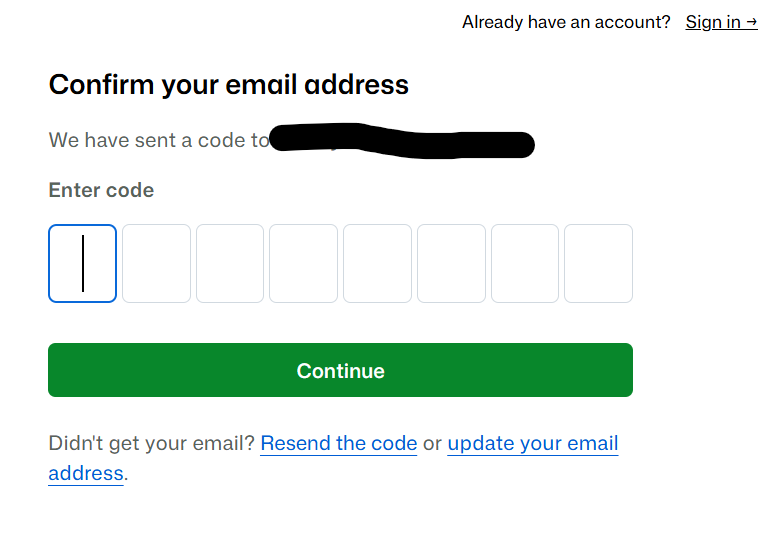
Click Continue
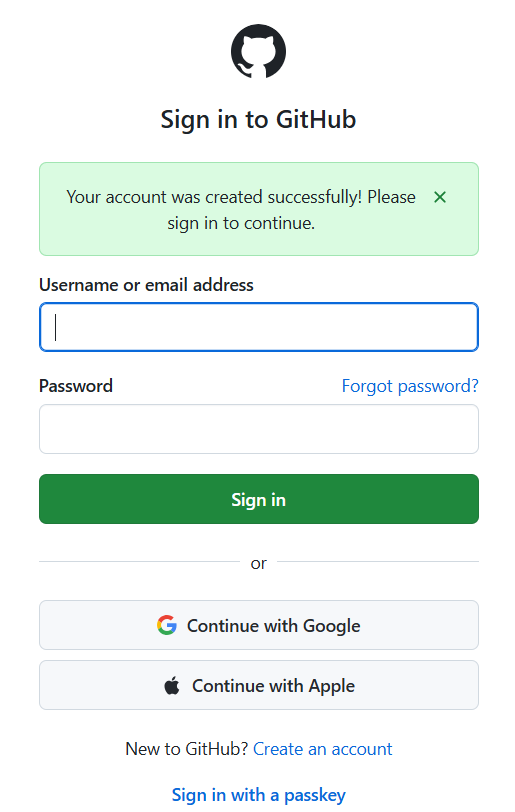
Creating Your First GitHub Repository
Go to github.com and log into your account
From your dashboard, click the green button labeled "Create New Repository"

Alternatively, from the main horizontal menu, click the repositories tab

Then once on repositories page, click the green button labeled "New"

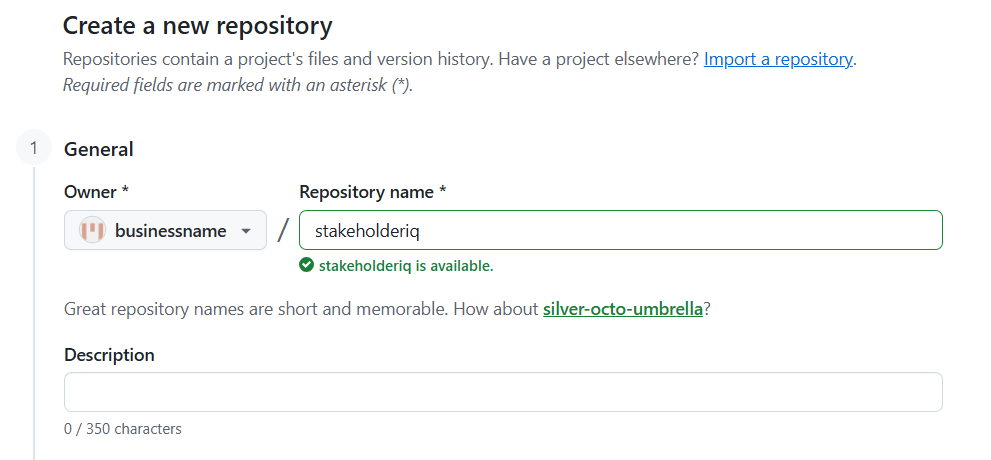
You will now be on the Create Respository screen as shown below:
Fill in Repository Details
Repository name — choose a short, descriptive name (e.g., my-first-repo)
If you purchased the StakeholderIQ product call it "stakeholderiq"
But it can be ANYTHING you wish it to be.
Description (optional) — briefly describe what the repo is about
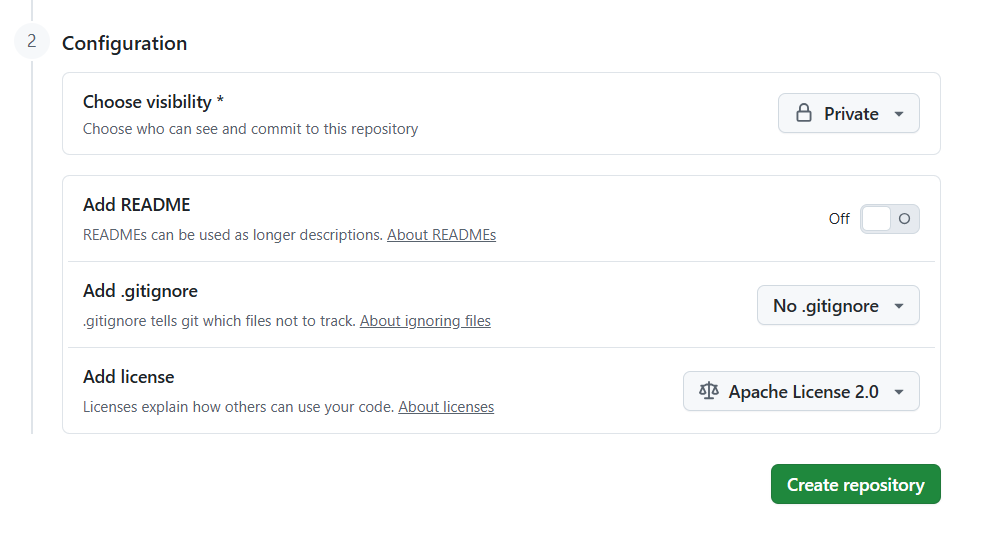
Visibility — choose Private — only you (and invited collaborators) can see it
README file — this creates a starting file describing your project. You do not need to create one here. Once you upload the product files to your repo, these files include a README.
(Optional) Add a .gitignore — tells Git which files to ignore (choose a template based on your language) I typically leave this as no. Not really needed for this kind of repo.
(Optional) Choose a license (MIT or Apache 2.0).
Click the green Create Repository button
You're Done!
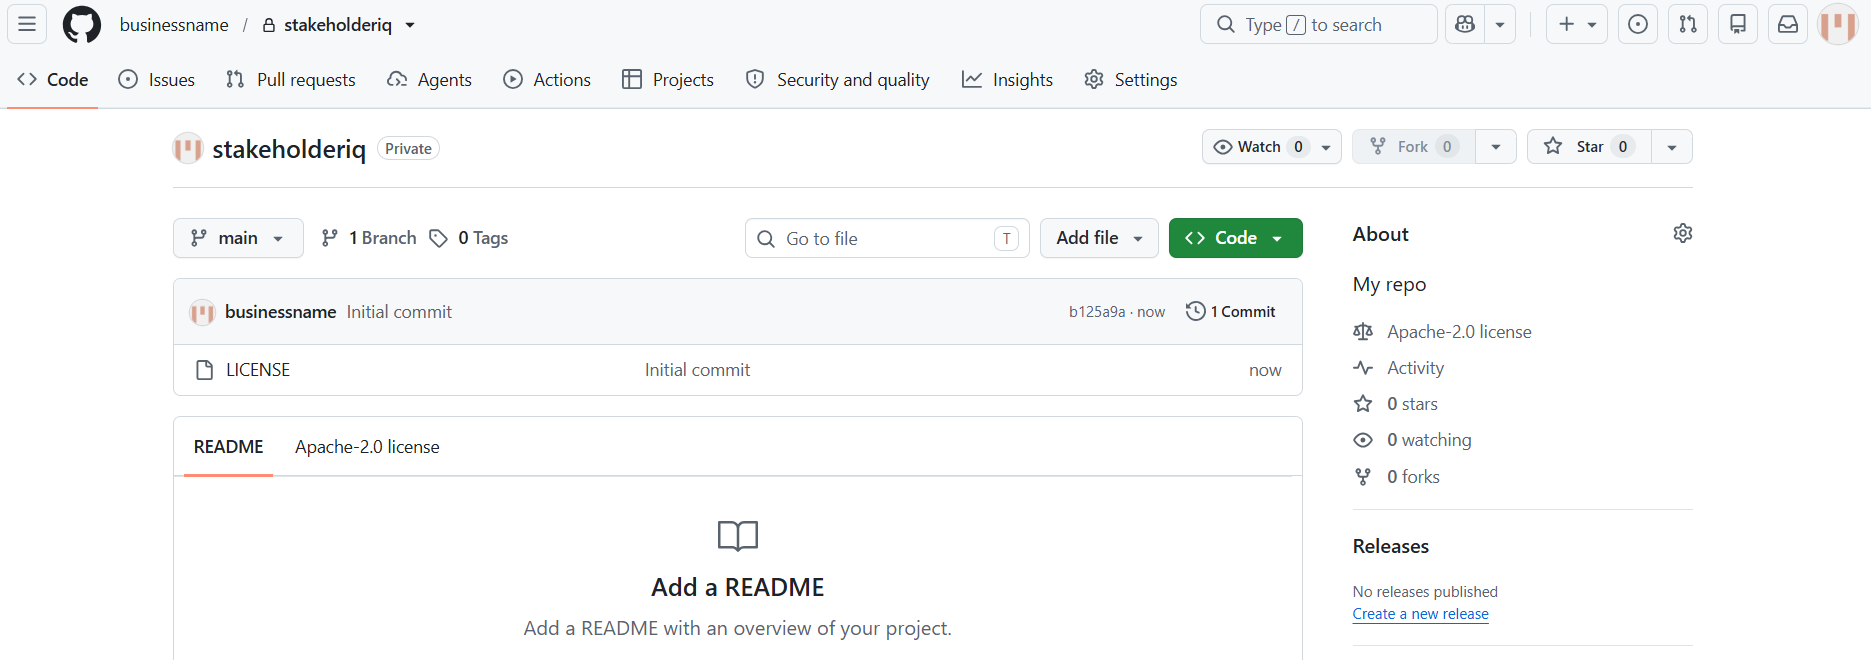
Your repo hom screen will look like this:
Download GitHub Software
Download the GitHub mobile app onto your phone.
Once installed, login with your credentials.
Your home screen in the app will look like this:
If you enable two factor authentication, you can use the GitHub mobile app as that authentification mechanism.
Download GitHub Desktop
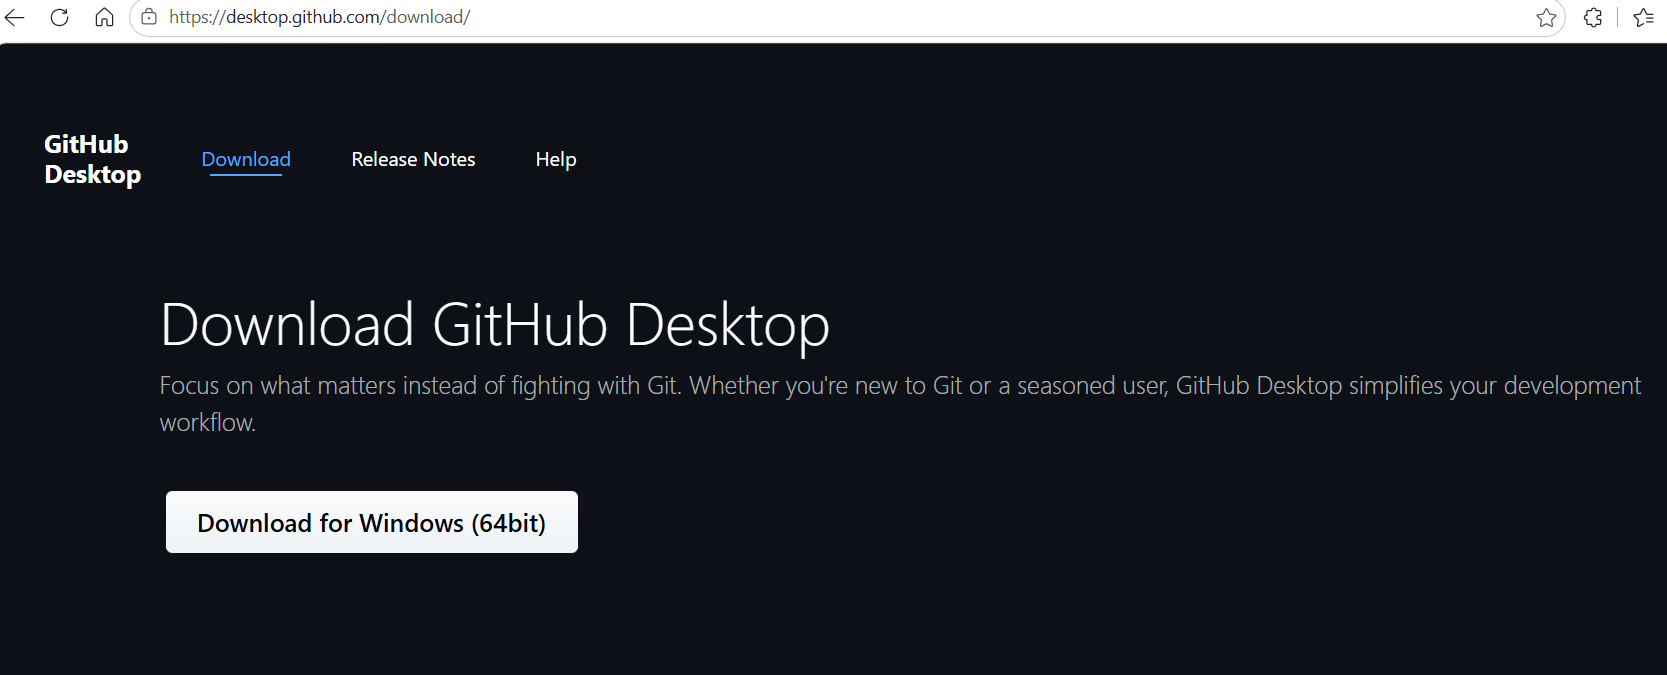
Click the Download for Windows or Download for macOS button (auto-detected)
Install on Windows
- Locate the downloaded GitHubDesktopSetup.exe file
- Double-click to run the installer
- The app installs automatically — no extra steps needed
- GitHub Desktop will launch once installation is complete
Install on macOS
- Locate the downloaded GitHubDesktop.zip file in your Downloads folder
- Double-click to unzip it
- Drag the GitHub Desktop app into your Applications folder
- Open it from Applications or Spotlight Search
Sign In to Your Account
- On the welcome screen, click Sign in to GitHub.com
- Enter your username/email and password in the browser window that opens
- Click Authorize desktop to grant access
- Return to the app — you'll be signed in automatically
- Configure Git Settings
- Enter your name and email (used for commit attribution)
- Click Finish
- You're Ready!
You can now:
- Clone an existing repository
- Create a new repository
- Add a local repository from your computer
- All managed through a simple, visual interface — no command line needed
Once installed, login.
You should see your username and repo in the upper left.
Clone Your Repo To Your Desktop
Click File
Choose Clone Repository
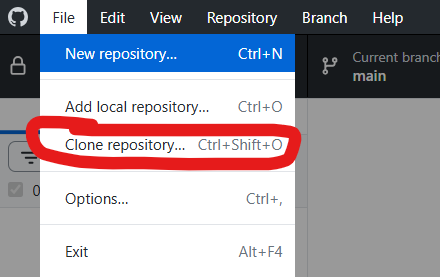
From the popup, choose the repo you want to clone.
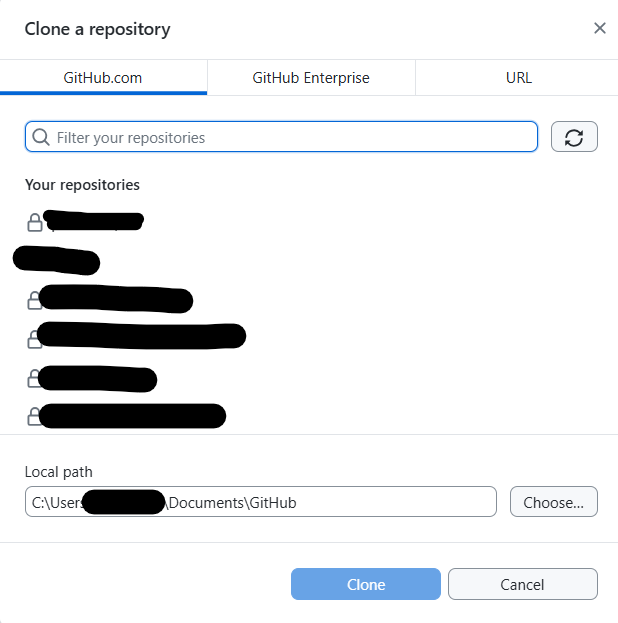
"Cloning" downloads exact copy of your repo to you desktop.
Select the repo you want.
Set the location where you want to dowload your repos.
What you see in the image is the default.
Click Clone.
The repo is now downloded to you PC.
(insert image)
Since that repo was empty, it will only be a folder. The folder name is the name of the repo.
Uploading product files to the repo
From your purchase email, download the zip file that was attached.

Unzip content

Open up stakeholderiq folder (the name of the extracted folder)
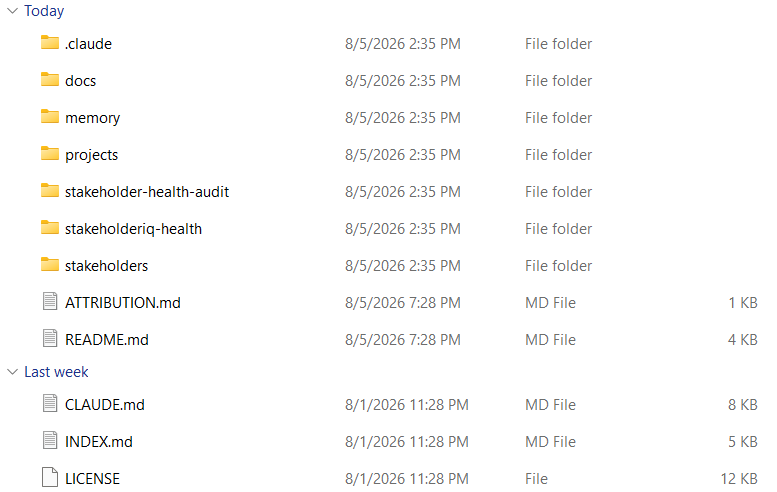
Select entire contents
Copy entire contents of folder
(do not copy at the highest level of stakeholderiq, you will produce a redundant layer of folders)
Paste the contents into the folder of the cloned repo:
C:\Documents\YourName\GitHub\stakeholderiq
If done correctly, it should look like this:
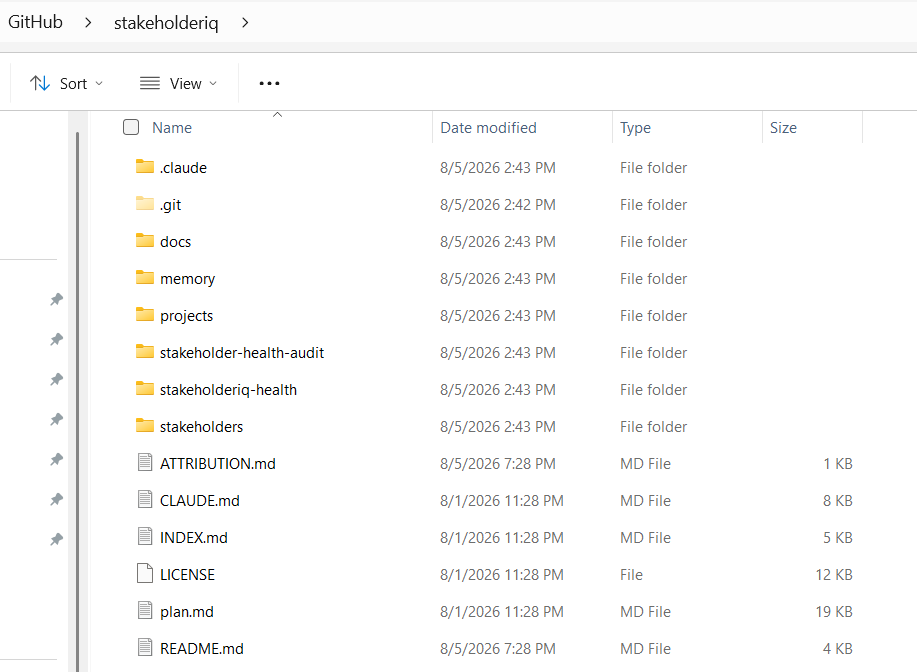
open GitHub desktop.
The repo changes will appear in your GitHub Desktop sidebar
It will look like a lot of file names with a plus (+) symbol
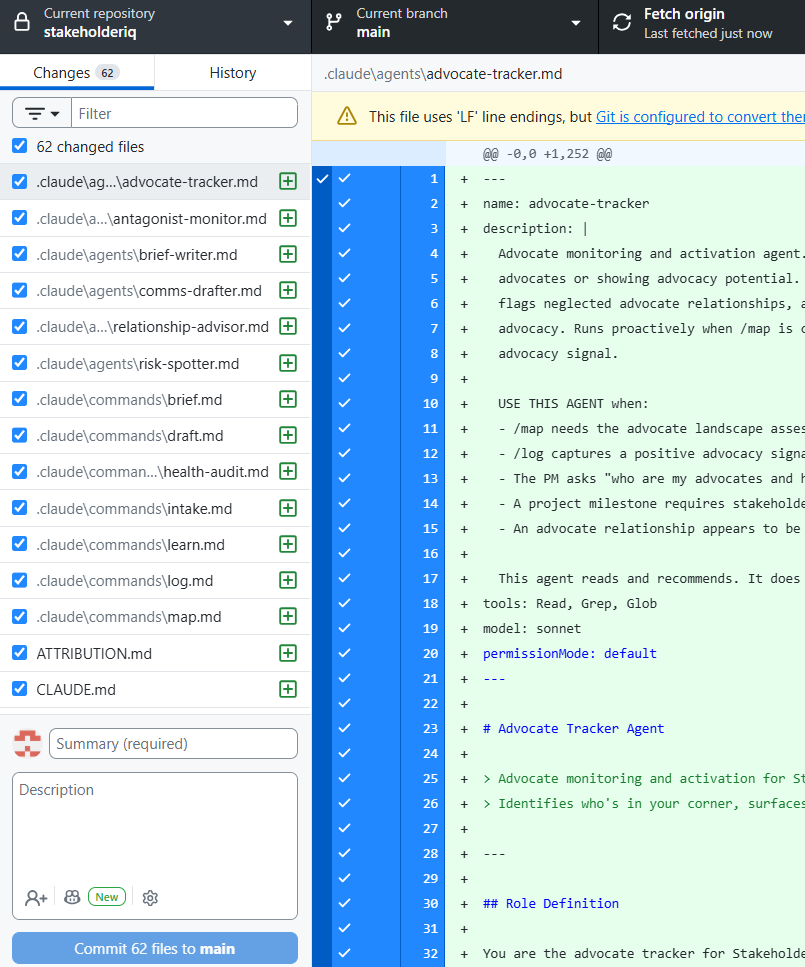
Now we want to commit them up to the repository.
Look in the lower left of GitHub Desktop:
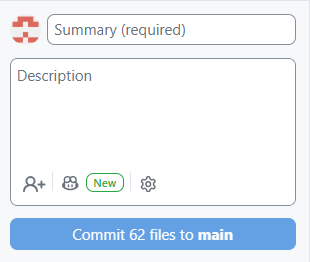
In the Summary field type:
"Intial Upload"
In the description type:
"Intial upload of stakeholderiq project brain"
(replace the stakeholderiq name with the product name you are actually using)
And now...
Hit that blue button that starts with the word "Commit"
The left side bar will clear.
And screen will display this:
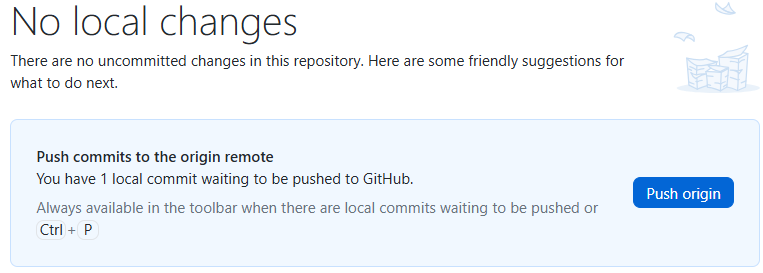
Hit that blue "Push origen" button
And now all the stakeholderiq files are loaded up into the GitHub repository.
You GitHub browser screen will now look like this:
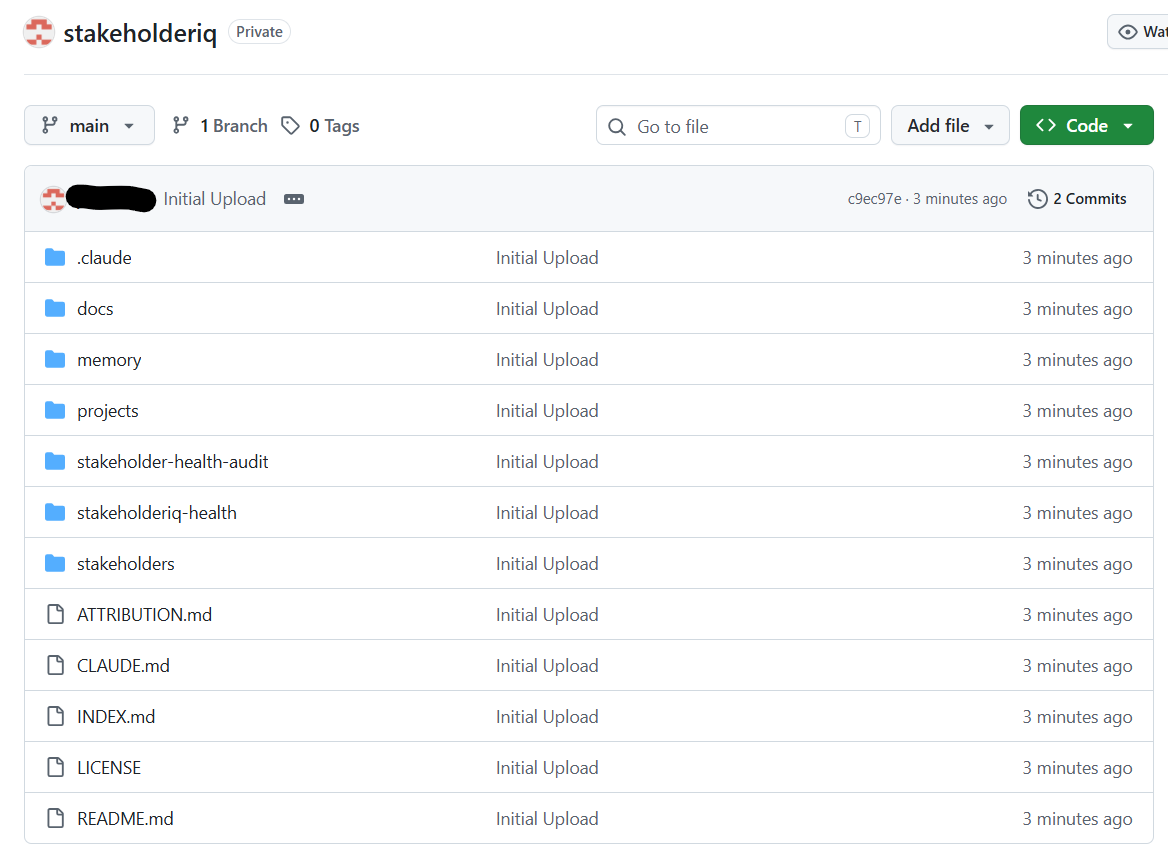
The file preparation is now complete!
Now we move on to connecting Claude Code.
Register for Free Claude Code Account
- Visit the official Claude AI website.
- Type your email address or click Continue with Google.
- Check your email for a verification code or secure login link.
- Enter your phone number if prompted to complete identity verification via text message.
- Agree to the terms of service and set up your display name
Upgrade to Claude Pro Plan
You cannot use Claude Code on the Free Plan. To use Claude Code you MUST sign up for a Pro Plan (minimum).
- Log in to your free Claude account.
- Click on your initials or name in the lower left corner and select “Settings” from the menu.
- Navigate to Settings > Billing and click the “Upgrade plan” button.
- After landing on the upgrade page, click “Get Pro plan.”
- Choose between monthly and annual billing periods.
- Enter your payment information and click “Subscribe.”
Connecting Claude Code to GitHub
First, and very important, REMAIN logged in to your GitHub account (github.com) on your browser or login to your GitHub Account now.
In another browser tab, have your Claude Account (claude.ai) open.
Find your account name in the lower left:

Left click to bring up the menu and choose Settings:
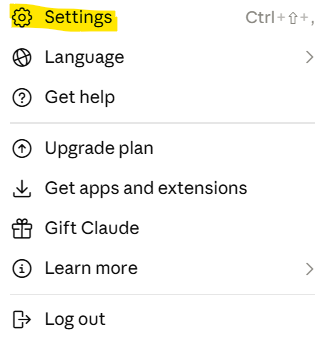
From the settings menu, choose Connectors
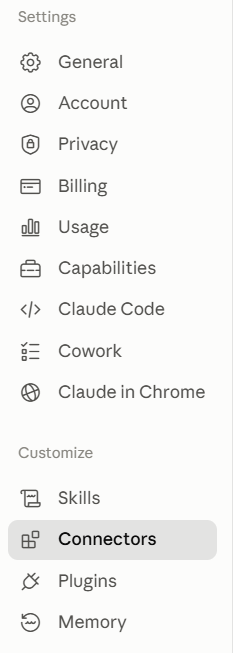
On the Connectors Page, search for GitHub Integration
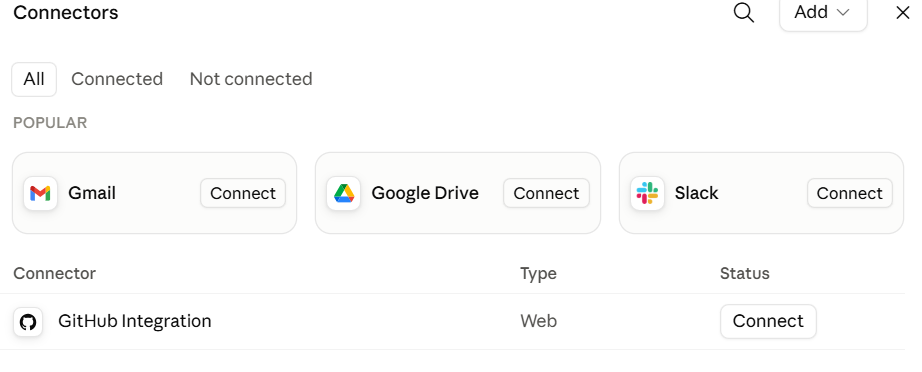
Click the Connect button.
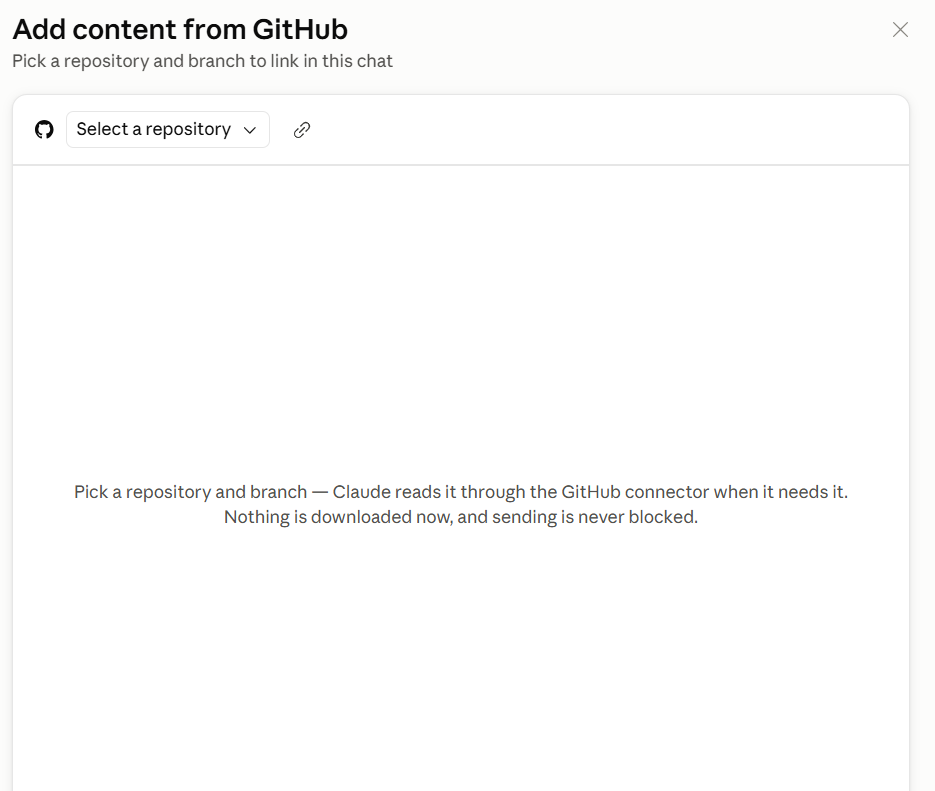
Click the "Select A Repository" dropdown.
Your list of respositories should appear:
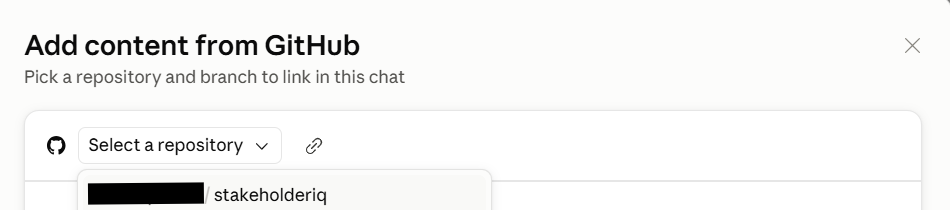
Select your repo and click Add Repository

Seeing your Repo from Claude Code
On the main Claude screen, in the upper left, there will be two options:
Home or Code
Make sure you select Code!!
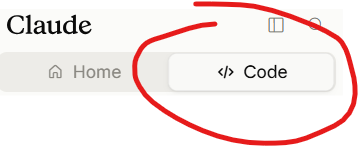
If your chat box is in the middle of the page, you are in the wrong spot. You are in Chat mode.
If you are in Claude Code mode, your chat box is at the bottom of the page.
And the tell-tale sign is the appearance of the Claude Code Mascot Thingy:
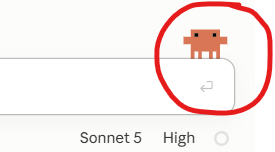
If you see the Mascot you are in the right place!
On the left of your text box, look for an item that has a "cloud" symbol:

In my image,it says "Canvas" but your is probably blank. So you need to create a new "cloud" environment for Claude Code. This is super fast and easy.
Click that cloud icon and the following options appear:
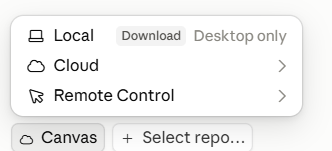
Click Cloud, and at the next sub menu, Click New Environment.
This screen appears:
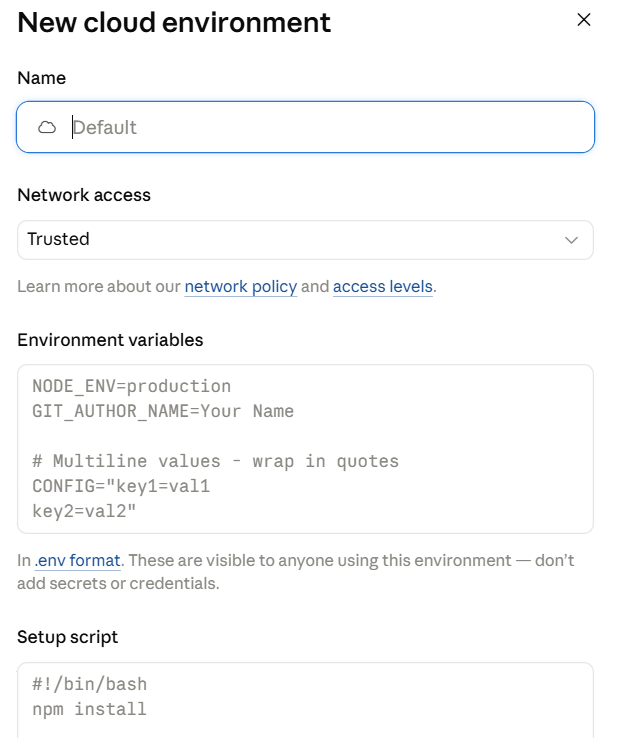
All you need to do is:
- Give it a name. Can be anything.
- Make sure Network Access is "Trusted"
Then click the Create Environment button at the bottom:

Your Cloud Environment will now show up in the "cloud icon" space. See the hightlight below.
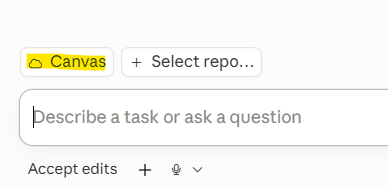
Next to the Cloud Icon/Environment name, click the "Select Repository" button:
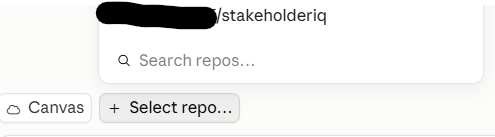
Select your Repo.
When complete Claude Code should look like this:

And you are now ready to begin using Claude Code to run your Project Brain!
Congrats!!!
A Doublecheck: See Claude Authorized within Github
On your Repo Home Screen on GitHub.com
Click the Settings item from the main horizontal menu

A big long list of settings will appear:
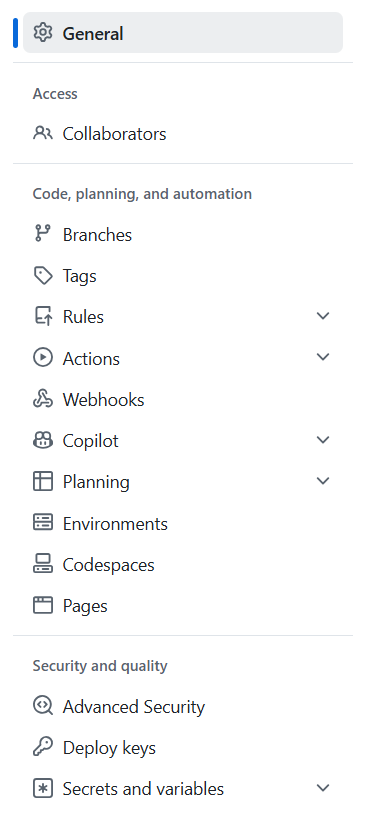

Near the bottom of that list, click "GitHub Apps"
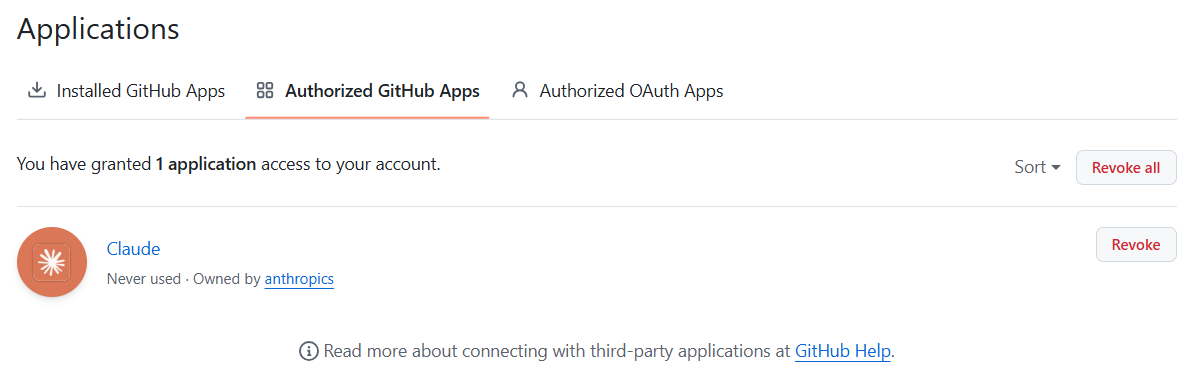
You should see Claude as an connected App the "Installed Apps" tab or the "Authorized Apps" tab